Replacing the capacitor on an AC unit is one of the most common DIY repairs homeowners can perform to restore cooling function. Capacitors play a critical role in starting and running your AC’s compressor and fan. This expert guide offers a clear, safe, and detailed process for replacing your AC unit’s capacitor, including key safety tips, troubleshooting advice, and essential tools you’ll need.
Understanding The Role Of A Capacitor In AC Units
The capacitor stores and releases electrical energy required to kickstart the compressor and fan motors. There are two main types: start capacitors and run capacitors. Start capacitors provide the extra boost needed to start the motor, while run capacitors supply a steady current to keep it running smoothly. A failed capacitor can cause your AC unit to stop cooling, run sluggishly, or fail to start altogether.
Common Symptoms Of A Bad Capacitor
- AC unit won’t start or is struggling to turn on
- The fan is not spinning
- You hear a humming sound but nothing happens
- AC cycles on and off more than usual
- Burning smell or bulging capacitor
Safety Precautions Before Replacing A Capacitor
Working with capacitors can be dangerous because they store high-voltage electricity. Before beginning, turn off the power at the circuit breaker and use a voltage tester to verify the unit is not energized. Even with the power off, a capacitor may still hold a residual charge.
- Shut off both the thermostat and breaker to the AC
- Wear insulated gloves and safety glasses
- Discharge the capacitor safely before removal
- Never touch capacitor terminals with bare hands
Tools And Materials Needed
| Tool/Material | Purpose |
|---|---|
| New Capacitor (exact specifications) | Replacement part |
| Screwdriver (Phillips/flat-head) | Remove access panel and secure wires |
| Insulated Needle-Nose Pliers | Remove and reattach wires |
| Multimeter (Voltmeter/Ohmmeter) | Confirm capacitor failure & discharge |
| Voltage Tester | Ensure no power is present |
| Markers/Camera | Label or photograph wire placement |
| Insulated Gloves & Safety Goggles | Personal protection |
Step-By-Step Guide To Replacing An AC Capacitor
Step 1: Turn Off Power Completely
Cut power at both the thermostat and circuit breaker. Double-check with a non-contact voltage tester or multimeter at the AC’s service panel before beginning any work.
Step 2: Access The Capacitor
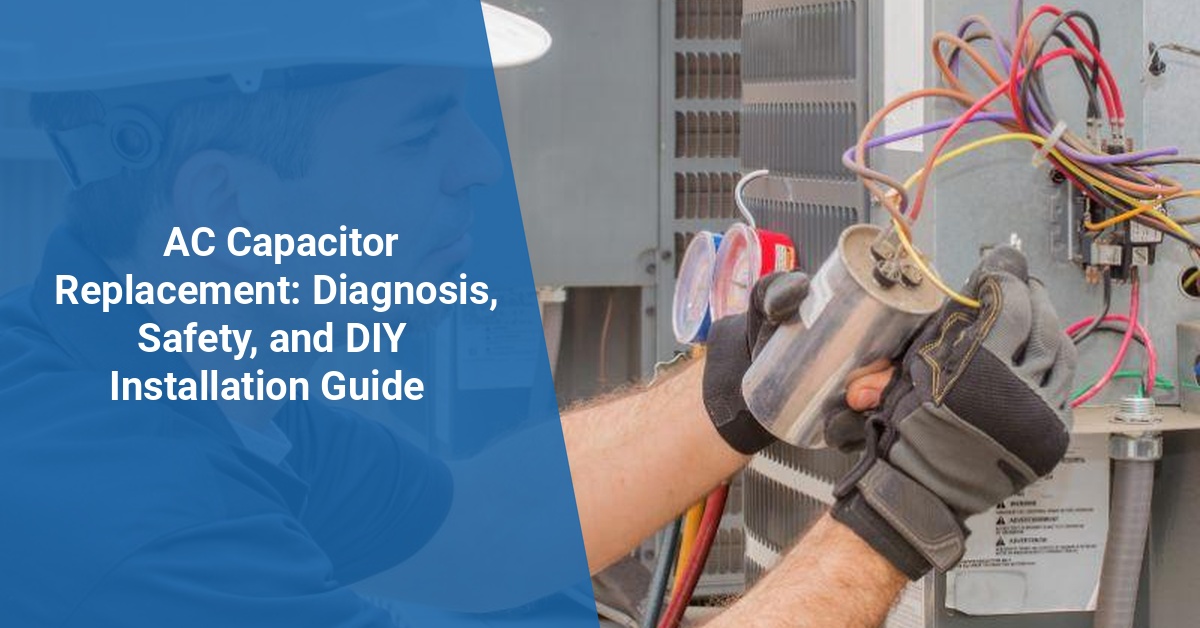
Find your outdoor AC condensing unit. Remove the screws and panels securing the electrical compartment. The capacitor is usually a cylindrical or oval canister with wires connected to terminals on its top.
Step 3: Discharge The Old Capacitor Safely
Capacitors can retain a potentially dangerous charge after being powered down. Discharge the capacitor by using an insulated screwdriver to bridge the terminals, or follow the manufacturer’s discharge procedure for safer results.
Step 4: Document Wire Placement
Before disconnecting anything, take a close-up photo or mark wires with tape or a marker, labeling where each wire attaches for reassembly. Mistakes at this step can cause future motor or system damage.
Call 888-906-9139 for Free Local HVAC Quotes – No Obligation, Just Savings!
Step 5: Remove The Old Capacitor
Using needle-nose pliers, carefully detach wires from the terminals one by one. Unscrew or unclip the mounting bracket holding the capacitor in place, then remove it.
Step 6: Match And Install The New Capacitor
Ensure the replacement has the exact same microfarad (μF) and voltage (VAC) rating as specified on the old one or in the AC manual. Position the new capacitor, secure with the bracket, and reconnect wires according to your notes or photos.
Step 7: Double-Check Your Work
Verify all wires are correctly and tightly connected, and no loose tools remain inside the compartment. Inspect the area for anything out of place before restoring power.
Step 8: Restore Power And Test
Close the access panel and secure screws. Turn the breaker and thermostat back on. Listen for immediate motor start-up. Check if the AC is cooling appropriately. If not, re-examine your steps or consult a professional.
Troubleshooting After Capacitor Replacement
Sometimes, issues persist after replacing the capacitor. Here are troubleshooting tips:
- If the AC still doesn’t start, suspect a faulty contactor, wiring issues, or other electrical faults.
- Unusual noises may signal a failing fan or compressor.
- If the replacement capacitor gets hot or leaks quickly, double-check the μF and VAC ratings.
Don’t hesitate to call an HVAC specialist if the system fails to operate normally after these steps.
Selecting The Correct Replacement Capacitor
Always use a capacitor with the exact microfarad and voltage ratings recommended by the manufacturer. Using mismatched ratings can damage your AC or produce unreliable performance.
Call 888-906-9139 for Free Local HVAC Quotes – No Obligation, Just Savings!
- The microfarad (μF or MFD) rating must match exactly.
- The voltage rating (VAC) can be equal or slightly higher but never lower.
- Physically compare shape and size for proper fit.
Most reputable HVAC supply stores can help you find the correct part using the AC unit’s model number.
How To Tell If Your AC Capacitor Is Bad: Testing Tips
Capacitors can be tested with a digital multimeter. Set the multimeter to the capacitance setting. Disconnect and discharge the capacitor, then touch the leads to its terminals. If the reading is significantly lower than the rated capacitance or zero, the capacitor is faulty. Modern multimeters provide quick and safe checks.
Read more on safe use of multimeters at Family Handyman or see official HVAC how-to guides at ACHR News.
Preventative Maintenance To Extend Capacitor Life
While capacitors usually last 5-10 years, regular AC maintenance helps prevent premature failure. Clean outdoor coils, maintain clear airflow, and check wiring annually to promote longer capacitor life and efficient AC operation.
- Have a professional inspect your AC before each cooling season.
- Ensure the outdoor condenser unit is free from leaves and debris.
- Tighten any loose electrical connections during routine service.
When To Call A Professional
If you’re not comfortable working with electrical components or feel uncertain at any step, consult a licensed HVAC technician. Professional repairs ensure safety and compliance with local codes. Seek help immediately if the breaker keeps tripping, wires are burned, or you suspect a refrigerant issue alongside capacitor failure.
- Professional diagnosis reveals deeper motor or compressor problems.
- Warranty coverage may require certified repairs.
- DIY errors can void warranties or create safety hazards.
For more information on professional HVAC service standards, visit Air Conditioning Contractors of America (ACCA).
Frequently Asked Questions About Replacing AC Capacitors
- Can I replace an AC capacitor myself? Yes, if you are comfortable with electrical DIY and follow strict safety protocols.
- How long does it take? Most replacements take 20-40 minutes.
- What does a replacement capacitor cost? Parts average $10-$45, while professional replacement ranges from $120-$250.
- Is it dangerous? Yes, capacitors can deliver a strong shock. Always fully discharge before handling.
Resources And References
- Department of Energy: Air Conditioner Maintenance
- This Old House: How to Replace an AC Capacitor
- Family Handyman: Air Conditioner Repair Tips
With safe practices and careful work, replacing a capacitor on an AC unit can be a straightforward way to bring your cooling system back to life.
Call 888-906-9139 for Free Local HVAC Quotes – No Obligation, Just Savings!