Protecting RV plumbing from freezing requires the right heater type for pipes, elbows, and holding tanks. This guide compares five popular Amazon options tailored for RVs and campers, summarizing key specs and use cases so you can match product features to your setup.
| Product | Type | Key Feature |
|---|---|---|
| HEATIT 30Ft Pipe Heating Cable | Self-regulating Heat Tape | Built-in thermostat, ETL certified |
| Cupohus Heat Tape 12FT | Self-regulating Heat Trace Cable | Thermostat starts at low temp, GFCI recommended |
| Facon 6″ x 18″ RV Pipe Heater Pad | 12V Heater Pad | Adhesive pad for 1-1/2″ pipe, DC 12V |
| Facon 3″ x 8″ RV Elbow Pipe Heater Pad (3-Pack) | 12V Elbow Heater Pads | Elbow-specific pads with adhesive foam |
| 6FT BDDFOTO Heat Tape 7W/FT | Self-regulating Heat Cable | 6 ft length with built-in thermostat |
HEATIT 30Ft Pipe Heating Cable For RV

This product is a 30 ft self-regulating heating cable designed for metal and plastic pipes and suitable for RV freeze protection. It lists ETL certification for the full cable and a UL certified plug, which addresses electrical safety expectations for mobile applications.
The cable operates at 5 W/ft with a built-in temperature controller that activates near 37°F (3°C) and shuts off at about 50°F (10°C). For RV use, this automatic cycling can reduce energy draw while preventing ice in water-filled lines.
Installation notes from features: the cable is intended for direct pipe attachment and is described as suitable for both metal and plastic piping. The product references energy-saving self-regulation but requires correct routing and insulation to meet lower-temperature protection claims.
Cupohus Heat Tape 12FT With Thermostat

The Cupohus unit is a 12 ft self-regulating heat trace cable promoted for plumbing protection and RV hoses. It is described to maintain hose temperatures above 59°F (15°C) and activate below about 41°F (5°C).
Safety features call for operation on a 120V GFCI outlet to prevent overheating or short-related issues. The internal wiring is stated as wrapped for moisture protection, important for exterior hose and exposed RV plumbing runs.
For RV systems, the Cable’s thermostat-controlled cycling helps limit continuous energy use. As with other heat tapes, selecting proper insulation over the cable and securing the tape to the pipe are key to achieving rated performance.
Facon 6 x 18 RV Pipe Heater Pad
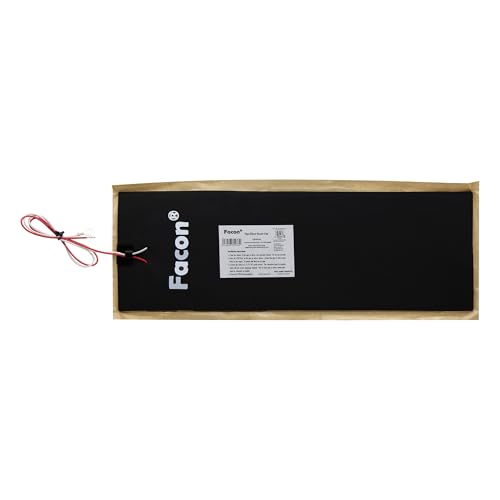
This is a 12V DC heater pad sized 6″ x 18″ intended for 1-1/2″ pipes and RV water tank systems. It’s marketed specifically for RVs, campers, and motorhomes and designed to be adhered to the exterior of pipes or tanks.
Features include a 3mm foam insulation backing with self-adhesive for installation simplicity. Panel-style pads like this are commonly used on RVs where 12V power is available from the vehicle’s battery or house bank, offering low-voltage freeze protection.
The product mentions a manual ON/OFF switch approach—turn on near freezing and off when temperatures stay above freezing. That method provides straightforward control but requires user intervention or a separately installed thermostat switch if automatic cycling is desired.
Facon 3 x 8 RV Elbow Pipe Heater Pad 3-Pack

These 3″ x 8″ elbow heater pads are designed for 1-1/2″ elbow sections commonly found in RV plumbing runs. The 3-pack covers multiple elbow joints or allows spares for repairs.
Each pad features 3mm foam insulation and adhesive backing to wrap onto elbows without additional hardware. They operate on DC 12–13.5V and are positioned as compatible with RV water systems, tanks, and steps.
The simple ON/OFF control method is noted in the features; users are advised to power the pads near freezing and switch off in warmer conditions. These pads are a targeted solution for vulnerable elbow locations where circulated heat from straight-run tapes may be less effective.
6FT BDDFOTO Heat Tape 7W/FT With Thermostat

The BDDFOTO heat tape is described as a 6 ft self-regulating cable with a temperature sensor and a built-in thermostat. It operates at 7 W/ft and includes a 3 ft power cord for direct plug-in use.
Operational details note the thermostat turns the cable ON below about 5°C (~41°F) and OFF above about 15°C (~59°F). Installation is described as pre-assembled and flexible for linear, spiral, or overlapping layouts, though most manufacturers advise against overlap for safety.
For small RV runs or targeted segments, a short length like this can be practical for exposed exterior lines or hose connections. Proper insulation over the cable is recommended to maximize effectiveness at lower ambient temperatures.
Buying Guide: How To Choose An RV Pipe Heater
Selecting the right RV pipe heater depends on power source, pipe material, installation location, and required automated control. Below are key considerations and comparison perspectives to guide selection.
Type And Power Source
- 12V Heater Pads: Best when you rely on RV battery power or DC circuits. Pads (like Facon) adhere to elbows or tanks and are efficient for short runs or isolated vulnerable points.
- 120V Heat Tape/Cables: Offer longer lengths and higher watt densities for extended exterior runs. Require shore power or an inverter capable of handling the load and should use GFCI protection.
Self-Regulating vs Fixed Wattage
- Self-Regulating Cables: Adjust output by ambient temperature, reducing energy use and lowering risk of overheating when overlapped. Good for mixed material runs (PEX, PVC, copper).
- Fixed Wattage Tapes: Provide steady heat but can overheat if overlapped or used on empty pipes. Installation guidance must be followed carefully.
Certifications And Safety
- Choose cables with ETL, UL, or CSA certification for the full cable when possible rather than plug-only certification. Certified products meet safety standards for electrical insulation and environmental protection.
- Use GFCI protection on 120V units and ensure weatherproofing for exterior runs. For DC pads, confirm wiring and fuse sizing match RV electrical system limits.
Length, Wattage, And Coverage
- Measure the entire vulnerable run, including elbows and fittings. Heat tape is linear—add lengths for bends and separate lines.
- Wattage per foot affects how much heat is delivered; higher W/ft can protect at colder temperatures but draws more power. Self-regulating cables modulate output to balance protection and consumption.
Installation And Insulation
- Follow manufacturer installation rules: many self-regulating cables recommend straight runs without crossing or overlapping. Adhesive-backed heater pads should fully contact the pipe or elbow surface.
- Add appropriate insulation over the heater to retain heat—fiberglass or closed-cell insulation is common. Insulation improves efficiency and performance in low ambient temps.
Control Options
- Built-In Thermostats: Provide automatic on/off cycling (e.g., HEATIT, BDDFOTO specifics). This reduces battery/shore power usage and avoids manual switching.
- Manual Switches: Simple approach for pads but requires monitoring. Consider adding a thermostat switch to automate DC pads.
Pipe Material And Use Cases
- Self-regulating cables are typically safe for metal and plastic (PEX, PVC) water-filled pipes. Confirm product labeling—for example some units explicitly restrict use to water-filled pipes only.
- Do not install on empty pipes, fuel lines, or ducts unless product documentation explicitly permits it.
Redundancy And Targeted Protection
- Elbows, external tanks, and exposed hose connections freeze first. Combining short heater pads on elbows with runs of heat tape on straight sections provides targeted protection with efficient power use.
- Keep spares and check warranty/service terms—RV environments have vibration and moisture exposure that affect long-term reliability.
Installation Checklist
- Confirm voltage compatibility (12V vs 120V) and available power source.
- Measure and plan lengths, allowing for bends and fittings.
- Use GFCI protection for 120V circuits and correct fuse/cutout for 12V runs.
- Secure heater to pipe per instructions; avoid overlaps unless allowed.
- Cover with recommended insulation to improve performance.
- Test operation before cold weather; monitor first cold cycle.