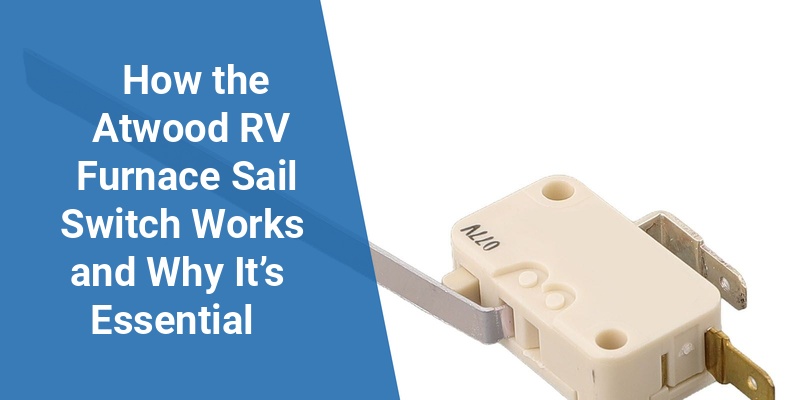
The Atwood RV furnace is a popular heating solution for many recreational vehicles, and a critical component ensuring its safe operation is the sail switch. This small but vital device detects airflow in the furnace, helping to prevent potential hazards caused by improper air circulation. Understanding how the Atwood RV furnace sail switch operates, its common issues, and maintenance tips can help RV owners keep their heating system running efficiently and safely.
| Component | Purpose | Common Issue | Maintenance Tip |
|---|---|---|---|
| Sail Switch | Detects airflow to activate furnace ignition | Failure to detect airflow causing furnace shutdown | Regularly check for debris and ensure proper placement |
| Blower Motor | Moves air across furnace heat exchanger | Burnout or weak airflow reducing switch activation | Clean and inspect motor and wiring annually |
| Ignitor | Lights the fuel inside the furnace | Failing ignitor preventing furnace startup | Test resistance and replace when necessary |
What is a Sail Switch in an Atwood RV Furnace?
The sail switch is a safety device integrated into the airflow system of the Atwood RV furnace. It consists of a small paddle or “sail” that moves in response to air movement generated by the furnace blower. When airflow is detected, the sail switch closes an electrical circuit enabling the furnace to ignite. This mechanism ensures the furnace only operates when there is adequate ventilation to carry heat safely through the RV’s ducts.
How the Sail Switch Functions in Furnace Operation
During furnace startup, the blower motor activates first, pushing air through the furnace heat exchanger. As air flows, it pushes the sail inside the switch to a closed position, sending a signal that it is safe to ignite the burner. If the sail switch does not detect airflow, the furnace ignition sequence is halted to prevent overheating or carbon monoxide buildup.
The sail switch acts as a critical interlock, preventing unsafe furnace operation. In this way, it protects the vehicle occupants by ensuring the combustion process only begins when sufficient airflow is present.
Common Causes for Sail Switch Malfunction
- Debris or Dirt Build-Up: Dust and debris accumulation can obstruct the sail, preventing it from moving freely and failing to close the circuit.
- Incorrect Installation or Misalignment: Improper placement or loose connections can cause the switch to give false signals.
- Worn or Broken Components: Over time, the mechanical parts inside the sail switch may wear out or break due to vibration and temperature changes.
- Blower Motor Issues: Weak or failed blower motors reduce airflow, preventing the sail switch from activating properly.
Signs Your Atwood RV Furnace Sail Switch Needs Inspection
Frequent Furnace Shutdowns: If the furnace repeatedly stops working mid-cycle, the sail switch could be falsely signaling no airflow.
Failure to Ignite: When the furnace blower runs but the burner does not light, the sail switch might be faulty or blocked.
Visible Damage or Debris: Physical inspection revealing dirt, corrosion, or damaged wiring around the sail switch warrants maintenance or replacement.
Call 888-906-9139 for Free Local HVAC Quotes – No Obligation, Just Savings!
How to Test and Replace the Sail Switch
Testing Procedures
- Turn off power to the furnace and disconnect the power source for safety.
- Locate the sail switch near the blower assembly inside the furnace housing.
- Manually move the sail paddle; you should hear or feel a click indicating the circuit closes.
- Use a multimeter set to continuity mode to test the switch terminals; the circuit should be closed with the paddle pushed in and open when released.
Replacement Steps
- Disconnect the power and carefully remove the furnace cover.
- Unfasten the sail switch mounting screws and disconnect wiring connectors.
- Install the new sail switch in the exact position, ensuring correct alignment with airflow direction.
- Reconnect wiring and secure all fasteners.
- Restore power and perform a test run to verify proper operation.
Maintenance Tips to Prolong Sail Switch Life
- Regular Cleaning: Use compressed air or a soft brush to clear dust inside the furnace compartment periodically.
- Inspect and Tighten Connections: Check that wires and mounting screws are secure to avoid intermittent faults.
- Monitor Blower Performance: Maintain the blower motor and replace worn belts or motors that fail to provide adequate airflow.
- Schedule Annual HVAC Checks: A professional furnace inspection can identify early signs of sail switch wear or related issues.
Why Proper Sail Switch Function Is Crucial for RV Safety
A malfunctioning sail switch can lead to overheating or incomplete combustion, raising the risk of carbon monoxide leaks inside the RV. Because the sail switch prevents ignition without sufficient airflow, it acts as a first line of defense against these dangers. Timely maintenance and replacement safeguard not only your RV’s heating system but also the health of everyone onboard.
Compatibility and Upgrades for Atwood RV Furnace Sail Switches
Various models of Atwood furnaces may use different sail switch styles based on the unit’s size and design. When replacing, it is critical to use genuine Atwood components or certified compatible parts to ensure performance reliability.
Some newer sail switches offer improved durability and sensitivity to airflow changes. Upgrading to these newer versions can enhance your furnace’s efficiency and reduce false shutdowns, providing a more consistent heating experience.
